Cherry Chocolate Cheesecake Recipe
When it comes to desserts that make hearts flutter, few can compete with the rich, creamy, and utterly indulgent Cherry Chocolate Cheesecake. This dessert is a heavenly combination of velvety chocolate filling, sweet cherry topping, and a buttery chocolate cookie crust. Whether you’re preparing for a special occasion or simply treating yourself, this cheesecake is guaranteed to impress! Let’s dive into this detailed recipe, filled with tips, tricks, and everything you need to make the perfect cheesecake.
Ingredients 📋
For the Chocolate Cookie Crust:
- 1 1/2 cups crushed chocolate cookies (like Oreos) 🍪
- 1/3 cup unsalted butter, melted 🧈
For the Chocolate Cheesecake Filling:
- 24 oz (3 packages) cream cheese, softened to room temperature 🧀
- 1 cup granulated sugar 🍄
- 3 large eggs, at room temperature 🍳
- 1/2 cup sour cream or Greek yogurt 🧀
- 8 oz semi-sweet chocolate, melted and slightly cooled 🍫
- 1 teaspoon vanilla extract 🌯
For the Cherry Topping:
- 1 1/2 cups cherry pie filling 🍒
- Fresh cherries (optional, for garnish) 🍒
- Whipped cream (optional) 🧋
- Chocolate shavings (optional) 🍫
Instructions 🥣
Step 1: Prepare the Chocolate Cookie Crust
- Preheat your oven to 350°F (175°C). 🔥
- In a medium-sized bowl, combine the crushed chocolate cookies and melted butter. Mix until the crumbs are evenly coated and resemble wet sand. 🍪
- Press the mixture firmly into the bottom of a 9-inch springform pan to create an even layer. Use the back of a spoon or a flat-bottomed glass for a smooth surface. 🌟
- Bake the crust for 8-10 minutes, then remove it from the oven and let it cool completely while you prepare the filling. 🕒
Step 2: Make the Chocolate Cheesecake Filling
- In a large mixing bowl, beat the softened cream cheese with an electric mixer until smooth and creamy, about 2-3 minutes. 💪
- Gradually add the granulated sugar and continue beating until fully combined and fluffy. 🥄
- Add the eggs one at a time, mixing well after each addition. This ensures a smooth batter without overmixing. 🥚
- Stir in the sour cream (or Greek yogurt), melted chocolate, and vanilla extract. Mix until everything is fully incorporated, and the batter is smooth and glossy. 🍫✨
Step 3: Assemble and Bake
- Pour the cheesecake filling over the cooled crust in the springform pan. Use a spatula to smooth the top evenly.
- Place the springform pan on a baking sheet to catch any potential drips.
- Bake the cheesecake in the preheated oven for 50-60 minutes. The edges should be set, but the center will still have a slight jiggle when you gently shake the pan. 👩🍳
Step 4: Cool and Chill
- Turn off the oven and crack the door open slightly. Allow the cheesecake to cool inside the oven for about 1 hour. This gradual cooling prevents cracks on the surface. 🕒
- Remove the cheesecake from the oven, run a knife around the edge to loosen it, and let it cool to room temperature on a wire rack. ❄️
- Once cooled, cover the cheesecake with plastic wrap or foil and refrigerate for at least 4 hours or overnight. The longer it chills, the better the texture and flavor will be. 😍
Step 5: Add the Cherry Topping
- Once the cheesecake is fully chilled, spread the cherry pie filling evenly over the top. Use a spoon to gently guide the cherries to the edges for a beautiful presentation. 🍒
- Optional: Add fresh cherries, whipped cream, or chocolate shavings for extra flair. These garnishes make your cheesecake look stunning and add an extra layer of flavor. 🍫
Tips for Success 💡
- Room Temperature Ingredients: Always ensure your cream cheese, eggs, and sour cream are at room temperature. This helps create a smoother batter and prevents lumps.
- Melt Chocolate Carefully: Melt the chocolate in short bursts in the microwave or over a double boiler to avoid burning. Let it cool slightly before adding it to the batter to prevent curdling.
- Water Bath for Perfection: If you’re worried about cracks, bake the cheesecake in a water bath. Wrap the bottom of the springform pan in aluminum foil to prevent leaks, and place it in a larger pan filled with hot water.
- Chill Time is Key: Cheesecake tastes best when it’s had time to set in the refrigerator. Don’t rush this step!
Storage and Serving 🧊🍽️
- Storage: Cover any leftover cheesecake tightly and store it in the refrigerator for up to 5 days. For longer storage, freeze slices individually wrapped in plastic wrap for up to 3 months.
- Serving: For clean slices, run a knife under hot water, dry it off, and cut through the cheesecake. Repeat this for each slice. Serve chilled with extra whipped cream or cherries if desired. 🥰
Why You’ll Love This Recipe ❤️
- Rich and Decadent: The creamy chocolate filling paired with the tangy cherries is a match made in dessert heaven. 🍫🍒
- Perfect Texture: The combination of cream cheese and sour cream ensures a velvety, smooth consistency.
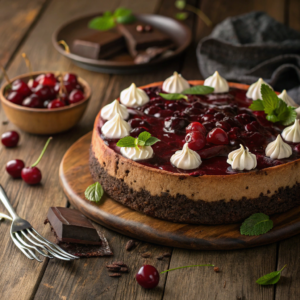
- Show-Stopping Presentation: With its glossy cherry topping and chocolate cookie crust, this cheesecake is as beautiful as it is delicious.
- Versatile: Customize it with your favorite toppings like fresh berries, caramel drizzle, or even nuts.
This Cherry Chocolate Cheesecake is more than just a dessert—it’s an experience. Every bite is a celebration of flavors and textures that will leave your family and friends begging for seconds. So, roll up your sleeves and give this recipe a try. You’ll be glad you did! 🍒🍫💖


